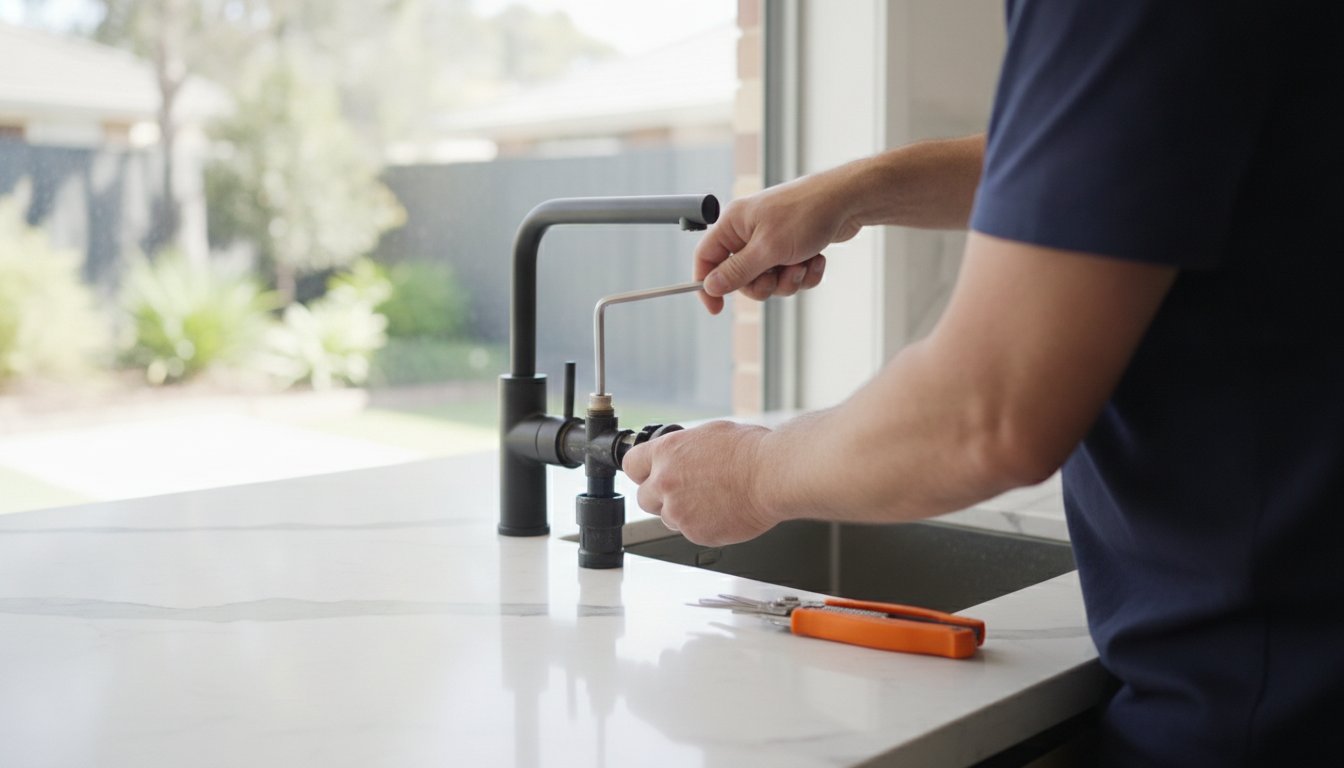
How to Fix a Dripping Faucet Cartridge: A Complete 2026 DIY Guide
How much sleep are you losing to that rhythmic "plink" of water hitting your sink, and how much of your hard-earned money is literally going down the drain? Learning how to fix a dripping faucet cartridge is the fastest way to stop that annoyance before it drives you crazy. You're likely worried that a simple repair might turn into a disaster if you strip a screw or break a fragile plastic part, right? It's a common fear, but you don't have to let a small leak lead to an expensive whole-fixture replacement.
We agree that a leaking tap is a household headache that needs a solution ASAP. You don't need years of trade experience to restore your peace and quiet. We promise to show you how to handle this repair FAST, giving you the confidence to tackle the job yourself without the stress. It's all about having a clear plan before you pick up a spanner.
This guide provides a no-nonsense breakdown of identifying your cartridge type, removing the old unit safely, and installing the replacement. You'll learn how to navigate the tricky steps so your faucet stays leak-free and your home stays dry. Let's get to work.
Key Takeaways
- Always shut off the water supply first to prevent a household mess and ensure a safe, dry workspace.
- Gather essential tools like Allen wrenches and needle-nose pliers before you begin to keep the repair moving FAST.
- Learn how to fix a dripping faucet cartridge by correctly identifying the retaining clip or bonnet nut for a smooth removal.
- Take your old cartridge to the shop for a physical match to guarantee you get the right replacement part ASAP.
- Recognise when a cartridge is seized or the valve is cracked, signalling it is time for professional help to avoid breaking the fixture.
What is a Cartridge Faucet and Why is it Leaking?
A cartridge faucet is the modern standard for Australian kitchens and bathrooms. It relies on a single internal component to control both water flow and temperature with precision. Unlike older styles that use rubber washers, a faucet cartridge uses internal ports that align to let water through. When you turn the handle to the "off" position, the cartridge shifts to block those ports completely. If the internal seals or the cartridge body itself becomes compromised, that watertight seal vanishes. Learning how to fix a dripping faucet cartridge starts with understanding that this single part is the heart of your tap's performance.
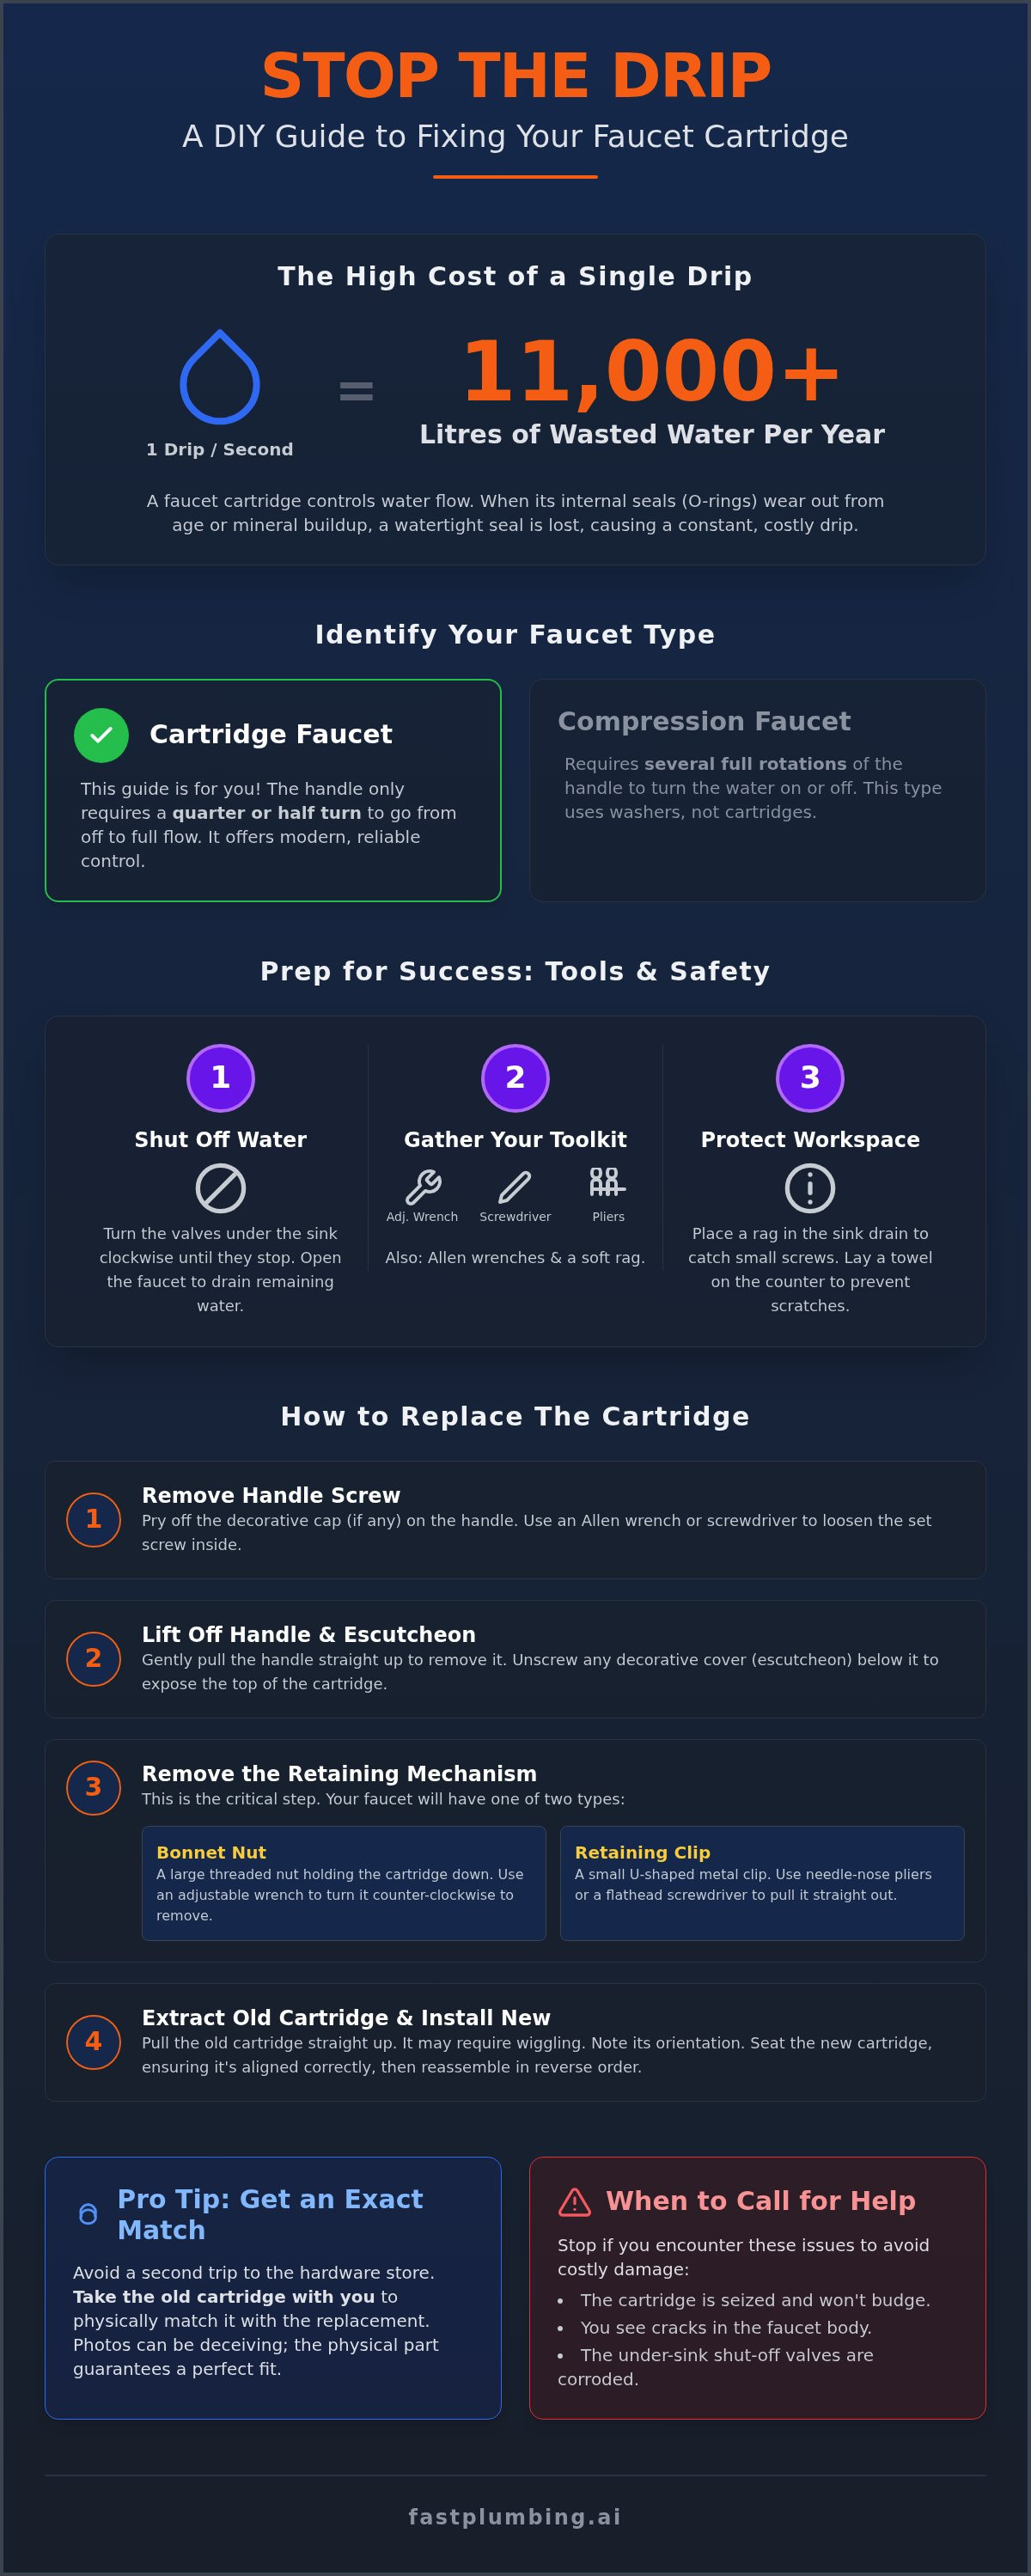
Why do these reliable components eventually fail? Most often, the culprit is mineral buildup from hard water or simple wear and tear on the internal O-rings. Over time, friction degrades the plastic or ceramic surfaces, allowing water to bypass the intended path. Sometimes the plastic housing itself develops a hairline crack due to age or excessive pressure. Don't let a small leak linger. A single drip per second can waste over 11,000 litres of water in a year, right? That is a massive spike on your water bill that you can solve FAST with the right approach.
Cartridge vs. Compression Faucets
You need to know exactly what you're working with before you start. Check your tap handle. Does it turn only a quarter or half-way? If so, you have a cartridge faucet. If you have to spin the handle several full rotations to get the water flowing, you're dealing with an old-school compression faucet. Cartridges are preferred today because they offer superior reliability and a smoother user experience. The specific anatomy of a cartridge includes a stem that connects to the handle, a hollow body that houses the ports, and several O-rings that act as the primary barriers against leaks. Mastering how to fix a dripping faucet cartridge is much simpler than dealing with the complex seat-and-washer setup of older models.
Identifying the Source of the Drip
The location of the leak tells you exactly what part of the cartridge has failed. If water is leaking from the spout, the internal seals or the cartridge ports are likely clogged or worn out. If you see water pooling at the base of the handle every time you turn the tap on, a worn O-ring on the cartridge body is the most probable cause. A bypass leak occurs when water escapes around the cartridge stem and flows out through the top of the handle assembly. Identifying these signs early helps you move toward a solution ASAP without wasting time on the wrong parts.
Essential Tools and Pre-Repair Safety FAST
You want to get this job done FAST. Preparation is the difference between a 20-minute fix and a three-hour nightmare. Before you even touch the tap handle, you must perform the "Fast Plumbing, LLC Prep." This starts with shutting off the water supply. It is the non-negotiable first step to ensure your bathroom doesn't turn into a swimming pool. If you skip this, you're inviting a crisis into your home.
Once the water is off, gather your gear. You don't want to be hunting for a tool with a disassembled tap sitting on your vanity. You will need:
- Allen wrenches (hex keys) for handle removal
- An adjustable wrench or shifting spanner
- Needle-nose pliers for pulling clips
- A flathead or Phillips head screwdriver
- A soft rag or towel
If your tap has white, crusty buildup, keep some white vinegar or CLR nearby. These chemical helpers dissolve mineral deposits that often seize cartridges in place. Before you unscrew a single thing, shove that rag into the drain. It's a simple move that prevents tiny set screws from disappearing forever. If you find your valves are too corroded to move, it might be time for professional leak detection or valve replacement to avoid a bigger crisis.
Locating Your Shut-Off Valves
Look directly under the sink for the "angle stops." These are the small valves on the copper or flexible lines leading to the tap. Turn them clockwise until they stop. If they feel stuck, do not force them. Old plastic handles can snap easily under pressure. If you can't turn them, you'll need to shut off the main water meter at the front of your property. Once the water is off, open the tap handles to bleed the lines. This releases any remaining pressure so you can start learning how to fix a dripping faucet cartridge without a sudden spray of water.
The "Clean-Up Like It’s Their Own" Workspace
We treat every home with respect, and you should too. Lay a soft cloth over the countertop to protect the stone or laminate from scratches. As you pull the tap apart, lay the components out in the exact order you removed them. This makes reassembly a breeze. Take a photo of every stage with your phone. No one ever remembers exactly which way the retaining clip was facing once it's out, right? A quick snap ensures you get the internal seals back in place ASAP. This organized approach is the secret to how to fix a dripping faucet cartridge without the typical DIY stress.
Step-by-Step: Removing the Old Cartridge
Ready to get your hands dirty? Start by removing the handle. Most modern Aussie taps have a small decorative cap hiding the set screw. Pop that off with a small flathead screwdriver and use your Allen wrench to loosen the screw inside. Pull the handle straight up and set it aside on your protective cloth. This exposes the internal assembly where the real work begins. You're halfway through the process of how to fix a dripping faucet cartridge, so keep your momentum going.
Now you will see either a large brass bonnet nut or a small metal U-clip. This is the only thing standing between you and that faulty cartridge. If you see a nut, use your adjustable wrench to unscrew it anticlockwise. If it's a clip, you'll need those needle-nose pliers to pull it out. Once these are removed, the cartridge should be ready for extraction. Grab the cartridge stem with your pliers and pull firmly. If it doesn't move, don't just yank it. You are now entering the "Stuck Cartridge" Protocol.
Dealing with Seized Retaining Nuts
Mineral bonds in Australian hard water areas can act like concrete. If that bonnet nut won't budge, apply a bit of penetrating oil or white vinegar and let it sit for ten minutes. Use the "Two-Wrench Technique" to avoid a disaster. Hold the faucet base steady with one wrench while turning the nut with the other. This prevents you from twisting the entire valve body and snapping the internal pipes under the sink. If the nut still won't move after a few tries, stop. Forcing it can lead to a flooded kitchen and a massive repair bill. This is a clear sign you need professional plumbing maintenance to save the fixture before it breaks.
Removing the Retaining Clip
Many popular brands use a U-shaped retaining clip to hold everything together. This clip is small and easy to bend, so use a steady hand. Use your needle-nose pliers to grip the top of the "U" and pull it straight up. Don't lose it. Before you pull the cartridge, use an old toothbrush to clean any grit or lime out of the clip slot. This makes the final extraction much easier and prevents the new cartridge from getting stuck later. Learning how to fix a dripping faucet cartridge is all about these small, careful movements that save you time and frustration. If the cartridge still feels like it's welded inside, a specialized cartridge puller tool can provide the extra leverage you need to solve the problem FAST.
Identifying and Installing the Replacement Cartridge
Most DIY guides assume you know the exact brand and model of your tap. The truth is that brands like Caroma, Dorf, or Methven have produced dozens of different styles over the decades. If you buy a part based on brand alone, you will likely end up with the wrong one. Take your old cartridge to a local plumbing merchant or hardware store for a physical match. Use an "Identification Matrix" by comparing the stem shape, the total length, and the specific port layout on the bottom. If the ports are off by even a millimetre, your effort to learn how to fix a dripping faucet cartridge will end in another leak.
Before you slide the new part in, apply a thin layer of silicone-based plumber's grease to the O-rings. This is mandatory. It ensures a leak-free seal and prevents the rubber from tearing during installation. Check the alignment of the "H" and "C" indicators on the cartridge body. If you install it upside down, your hot and cold water will be reversed. That is a frustrating mistake you want to avoid, right? If you find the internal valve body is too damaged for a new part to seat correctly, it's time to call the experts for a professional faucet replacement to get your kitchen back in order ASAP.
The Hidden Components: Seats and Springs
Some tap styles, particularly those following Delta designs, use small rubber seats and metal springs located behind the cartridge. If your tap still drips after you replace the cartridge, these are the likely culprits. They can become pitted or dirty over time, preventing a proper seal. Use a small, soft brush to clean the interior of the valve body. Removing grit and mineral scale now ensures the new components sit perfectly flush. This extra step is the secret to a long-term fix that lasts for years rather than weeks.
Reassembly and Testing
Align the tabs on the side of the cartridge with the notches in the valve body. You should feel a distinct "click" or a firm seat when it is correctly positioned. Reinstall the U-clip or screw the bonnet nut back on by hand first. Use your wrench for the final turn, but do not over-tighten! Excessive pressure can crack the new plastic housing instantly. Once everything is secure, perform the "Slow Reveal." Turn the water supply back on very slowly. This prevents a sudden pressure surge from damaging the new seals. Watch the base of the handle for immediate leaks as the lines pressurise. If it stays dry, you have successfully mastered how to fix a dripping faucet cartridge with professional-grade precision.
When DIY Fails: Pro Solutions for Stubborn Leaks
Sometimes, even the most detailed guide on how to fix a dripping faucet cartridge isn't enough to beat a stubborn fixture. You might find that after installing the new part, the leak persists. This is often a sign of a cracked valve body. When the internal housing of the tap fails, no amount of new O-rings or plastic cartridges will solve the problem. It's a structural issue that requires a full fixture replacement to prevent water damage to your vanity. We see this often in older Australian homes where the metal has simply reached its limit.
The "Seized Cartridge" nightmare is another common roadblock. In many areas with hard water, years of mineral buildup can practically weld the cartridge to the valve body. If you pull too hard without the right specialized extraction tools, you risk snapping the brass housing entirely. A botched DIY attempt can quickly escalate into a leak detection emergency if a pipe bursts or a joint fails behind the wall. At Fast Plumbing, we act as the 24/7 safety net for homeowners who need a professional hand to finish the job FAST.
When to Call an Emergency Plumber
Precision matters in plumbing. If your under-sink shut-off valve breaks or refuses to close fully, you can't wait. You need a solution ASAP. Watch out for the sound of running water behind your wall after you've finished your repair. This usually indicates an internal leak that could rot your house frame or cause mould. Finally, be honest about your time. If you've spent more than three hours struggling with what was supposed to be a 30-minute repair, it's time to call in the experts, right? Don't let a small drip turn into a weekend-long headache.
The Fast Plumbing Guarantee
We pride ourselves on rapid response times for mid-repair disasters. Our team brings over 29 years of industry experience to every job, ensuring we solve your problem on the first visit. We believe in transparency. That is why we provide clear plumbing repair costs before we start any work. You won't have to guess what the final bill looks like. Our "Clean-Up Like It's Their Own" promise ensures we leave your sink and countertop in pristine condition. We treat your property with total respect, providing a hassle-free experience from the moment we arrive at your door.
Restore Your Peace and Quiet FAST
You now have a clear roadmap to silence that annoying drip and save thousands of litres of water. The secret to a successful repair is simple: prepare your workspace, plug the drain, and always match your replacement part physically at the shop. Taking an extra minute to lubricate those O-rings ensures your new seal lasts for years. You've learned exactly how to fix a dripping faucet cartridge, giving you the confidence to maintain your home like a pro.
Sometimes, old Australian fixtures just won't cooperate. If you're facing a seized component or a cracked valve body, don't risk a household flood. Our licensed and insured experts provide 24/7 emergency service to get your tap flowing properly ASAP. We guarantee a "Clean-Up Like It’s Their Own" promise, so your bathroom stays spotless. Stuck with a seized cartridge? Call Fast Plumbing for a 1-minute callback guarantee! You can handle this job, and we are always here if you need a professional safety net.
Frequently Asked Questions
How do I know which faucet cartridge I need?
You identify the correct cartridge by removing the old unit and taking it to a local plumbing merchant for a physical comparison. Matching by brand name alone often fails because manufacturers produce dozens of variations over time. You must verify that the stem shape, total length, and bottom port layout are identical. If you are unsure, bring the tap model number or a clear photo of the fixture to help staff narrow it down.
Do I really need a special cartridge puller tool?
You don't always need a specialized cartridge puller, but it is a lifesaver for seized components or specific brands. For most standard Australian taps, a pair of needle-nose pliers provides enough leverage to ease the part out. However, if the cartridge is stuck due to mineral buildup, using a puller prevents you from snapping the plastic stem. If it doesn't budge with moderate pressure, consider professional help before the valve body breaks.
Can I just clean the old cartridge instead of replacing it?
Cleaning an old cartridge is a temporary fix that rarely solves the underlying problem of a worn seal or cracked housing. You can soak the unit in white vinegar to remove mineral scale, which might improve water flow. However, if the internal O-rings are perished or the ceramic discs are scored, no amount of cleaning will stop the leak. Replacing the unit is the only way to ensure a long-term, hassle-free result for your sink.
What happens if I install the faucet cartridge upside down?
Installing a cartridge upside down or 180 degrees out of alignment will reverse your hot and cold water controls. This is a common mistake when learning how to fix a dripping faucet cartridge. While it won't typically cause a leak, it creates a safety hazard, especially for children who might expect cold water and receive scalding hot instead. Simply disassemble the handle, rotate the cartridge to the correct orientation, and reassemble to solve the issue.
Why is my faucet still dripping after I replaced the cartridge?
A persistent drip after replacement usually indicates that debris is trapped in the valve body or that the internal seats and springs are worn. If you didn't flush the lines or clean the housing before installation, grit might be preventing the new cartridge from sealing correctly. In some cases, the valve body itself could have a hairline crack or pitting. This is when professional assistance becomes necessary to identify if the entire fixture needs replacing.
How much does it typically cost to have a pro replace a cartridge?
Professional repair costs vary based on your location in Australia, the complexity of the tap, and the specific replacement parts required. Most plumbers charge a standard call-out fee plus labour and the cost of the cartridge itself. While we cannot provide a fixed price here, we recommend choosing a provider with transparent, flat-rate pricing. This avoids any surprises on the final bill and ensures you receive a professional, guaranteed fix for your leaking fixture.
Is a dripping faucet considered a plumbing emergency?
A minor drip is rarely a high-priority emergency, but it becomes one if the water flow is heavy and cannot be shut off at the valves. Constant leaking can also lead to secondary issues like cupboard rot or mould growth if water pools under the sink. If your attempt at how to fix a dripping faucet cartridge leads to a broken pipe or a stuck valve, you need an emergency plumber ASAP to prevent property damage.
How long should a new faucet cartridge last?
A high-quality faucet cartridge typically lasts between 10 and 20 years, depending on your local water quality and usage habits. In Australian regions with hard water, mineral buildup can shorten this lifespan by causing the seals to perish sooner. You can extend the life of your cartridge by installing a water softener or simply avoiding excessive force when turning the tap off. Regular maintenance checks help catch small issues before they become expensive leaks.
