How to Flush a Water Heater to Remove Sediment: A Step-by-Step 2026 Guide
Is your water heater screaming for help? That loud, rhythmic popping coming from your utility closet isn't just a nuisance; it's the sound of mineral scale trapped at the bottom of your tank. You likely feel the frustration of waiting too long for hot water or seeing your monthly energy bills climb for no reason. Learning how to flush a water heater to remove sediment is the best way to solve this common headache, especially since sediment buildup causes hot water issues for over 60% of households in hard-water areas. You want a quiet home and a reliable shower without the fear of a sudden tank rupture or a scalding leak.
We agree that a noisy, inefficient heater is a stress you don't need. This 2026 guide provides the exact, professional-grade process to clear sediment buildup, lower your energy bills, and stop those annoying popping noises for good. We'll walk you through everything from essential safety shut-offs to the pressurized agitation technique that ensures a deep clean. Let's get your hot water back on track FAST.
Key Takeaways
- Stop loud popping noises and lower your energy bills by clearing out mineral buildup FAST.
- Master the critical safety steps to protect your home from gas leaks or electrical hazards before you begin.
- Learn the exact process for how to flush a water heater to remove sediment without causing a mess or flooding your garage.
- Solve common DIY disasters like clogged drain valves or air pockets in your pipes with our expert troubleshooting tips.
- Extend the life of your appliance and enjoy a quiet, efficient home by following this simple annual maintenance routine.
Understanding Why Sediment Buildup is Killing Your Water Heater
Sediment is a silent killer for your plumbing. It is actually a collection of calcium and magnesium minerals that settle at the bottom of your tank. As these minerals solidify, they create a thick, rocky barrier between the heating element and the water. This forces your heater to work twice as hard to reach the desired temperature. You might notice a strange popping or rumbling sound; this is called kettling. It happens when steam bubbles get trapped under the sediment layer and finally burst through. This constant stress on the tank isn't just noisy; it's a warning sign.
Understanding how storage water heaters work reveals why this buildup is so destructive. When the bottom of the tank stays too hot for too long, it can crack the protective glass lining. Once that happens, corrosion takes over the steel tank. This leads to premature failure and potentially thousands of dollars in water damage. Learning how to flush a water heater to remove sediment isn't just about maintenance; it's about protecting your home from a catastrophic leak.
The Real Cost of Ignoring Water Heater Maintenance
A significant sediment buildup typically causes a 10% to 15% loss in heating efficiency. This means you're paying more every month for less hot water. If you have an electric model, sediment can completely bury the lower heating element. When this happens, the element can't dissipate heat into the water and will burn out FAST. You might also notice a foul, rotten egg smell coming from your taps. This occurs because sediment creates a perfect environment for sulfur-producing bacteria to thrive and react with your anode rod.
How Often Should You Flush Your Tank?
Consistency is the key to a long-lasting appliance. We recommend a full flush at least once a year for standard water conditions. If you live in an area with hard water, you should increase this frequency to every 6 months to prevent scale from hardening into a solid mass. For a complete look at your home’s needs, check our Essential Plumbing Maintenance Checklist. Staying ahead of these small tasks will solve your hot water problems before they start and keep your monthly bills low.
Pre-Flush Preparation: Tools and Critical Safety Steps
Preparation is the difference between a successful maintenance task and a flooded garage. You need the right gear and a strict safety protocol to get the job done without a headache. Gather your heavy-duty garden hose, a large bucket, and a flat-head screwdriver. If your tank is heavily neglected, an optional sediment buster tool can help break up stubborn mineral chunks. These tools make the process hassle-free, right?
Safety is our top priority. You must never drain the tank without turning off the heat source first. If you leave the power on while the tank is empty, you risk a dry fire. This occurs when electric elements or gas burners heat an empty tank; the metal can melt or elements can burn out in seconds. We treat your property with the same respect we'd show our own home. Following a professional sequence protects your appliance and your safety. For manufacturer-specific advice, you can also review A. O. Smith's guide to flushing a water heater to ensure you are following the best practices for your specific model.
Power-Down Sequence: Gas vs. Electric
The shut-off process depends on your fuel source. For electric models, find your home's main electrical panel. Locate the dedicated breaker for the water heater and flip it to the OFF position. Use a non-contact voltage tester to verify there is no power at the unit before you touch any wires. For gas models, look for the thermostat knob on the front of the tank. Turn it to the Pilot or Vacation setting. This keeps the pilot light lit but prevents the main burner from firing up while you work. If you feel uncomfortable handling gas lines or electrical panels, our team can handle your water heater maintenance quickly and safely.
Cooling the Water and Managing Pressure
Don't risk a serious burn. Let the water cool for at least two hours before you start the drain process. If you are in a rush, run a hot water tap in a bathtub until the water feels lukewarm. Once the water is safe, shut off the cold water intake valve. This is usually the blue handle located on the top of the tank. Finally, open a hot water faucet somewhere else in the house. This breaks the vacuum inside the tank and allows the water to flow out of the drain valve FAST. Learning how to flush a water heater to remove sediment requires this air-bleed step to ensure the tank empties completely and efficiently.
Step-by-Step: How to Flush Your Water Heater Like a Pro
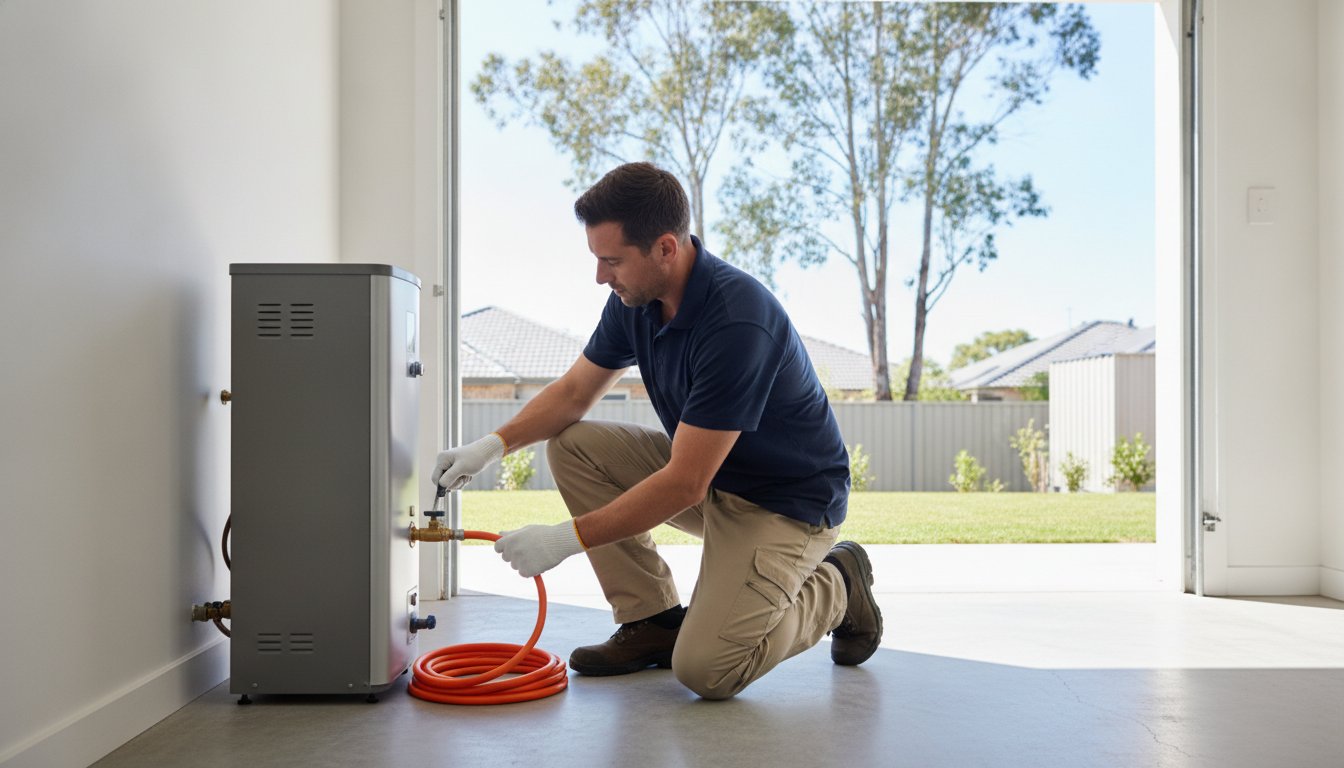
Now that your power is off and the water has cooled, it is time for the main event. Connect your heavy-duty garden hose to the drain valve at the bottom of the unit. Lead the other end to a safe drainage spot like a floor drain or your driveway. If you are draining onto a driveway, ensure the water won't damage your landscaping or create a slip hazard. Open the drain valve slowly using your screwdriver or the handle. You will likely see cloudy water or small mineral pebbles exiting the hose immediately. These "pebbles" are the hardened calcium deposits that have been stealing your heater's efficiency.
Standard guides often tell you to just let the water run out until it stops. We go further. To truly solve the problem, use the Pressure-Flush technique. While the drain valve is open, briefly turn the cold water intake valve back on. This creates a pressurized blast that pushes settled gunk toward the drain. It ensures you are not leaving the heaviest debris behind. Learning how to flush a water heater to remove sediment properly means using this extra force to get every last bit of scale out of your tank. This professional secret makes the process much more effective and gets the job done FAST.
The Agitation Method for Stubborn Debris
Some mineral deposits are too heavy for a simple drain. You need to stir them up to get them moving. Toggle your cold water intake valve in short, 15-second bursts. This agitation lifts the settled minerals off the tank floor so they can flow out the hose. Repeat this burst process several times. You should continue until the water exiting the hose is crystal clear and free of any visible particles. Do not use the Temperature and Pressure (T&P) valve for drainage purposes. It is a safety device, not a drain; it often fails to reseal properly after being opened, which creates a new headache for you.
Testing the Drain Valve for a Tight Seal
Once the water runs clear, close the drain valve completely. Remove the hose and wait at least five minutes. Watch the valve closely for any signs of a "drip-drip" lingering at the opening. A tight seal is vital for a hassle-free finish, right? If you see a persistent leak, the valve might be damaged or clogged by the very sediment you just removed. In these cases, the valve usually needs a professional replacement to keep your home dry and safe. We can help you replace a faulty valve ASAP to prevent water damage and restore your peace of mind.

Troubleshooting: What to Do When the Flush Goes Wrong
Sometimes, the "gunk" wins. If you open the valve and nothing happens, don't panic. A thick layer of sediment is likely blocking the opening. Another common issue is a vacuum lock. If the water stops flowing mid-flush, check that your hot water tap is still open to let air in. You might also encounter a stuck handle. Many drain valves have plastic stems that snap easily under pressure. If it doesn't budge with light force, stop immediately. Snapping that stem turns a simple maintenance task into an emergency flood. You want a hassle-free fix, not a broken valve, right?
Watch the water carefully as it exits the hose. If you see large, white or gray chunks of plastic in your bucket, your dip tube is likely disintegrating. This tube directs cold water to the bottom of the tank so it can be heated efficiently. When it breaks, your hot water supply will be short and inconsistent. This is a serious mechanical failure that a simple flush won't fix. Learning how to flush a water heater to remove sediment is great for maintenance, but it can't repair a crumbling internal component. If your DIY flush hits a wall, contact us for professional water heater service ASAP.
Clearing a Clogged Drain Valve Safely
If sediment blocks the flow, use the water's own pressure to clear the path. Briefly open the cold water intake valve for a few seconds. This often pushes the clog through from the inside out. Never "poke" the valve with a metal hanger or screwdriver. You will damage the internal threads or ruin the seal, which leads to a permanent leak. If your current valve is plastic and gives you trouble, consider upgrading to a heavy-duty brass ball valve. Brass handles the heat and debris much better than cheap plastic parts. We can swap this out for you to make future maintenance FAST and clean.
When the Popping Noises Persist After a Flush
Did you finish the job only to hear that familiar rumbling? Sometimes, the mineral scale has hardened into a solid "brick" at the bottom of the tank. A standard flush might not be enough to break it up. In these cases, your heating elements might be coated in a thick layer of rock. This continues to cause "kettling" even after the loose debris is gone. You might need a professional descaling treatment to restore full efficiency. For a deeper look at these mechanical issues and how to solve them, read our Water Heater Repair guide. We'll help you diagnose the problem and get your quiet home back today.
Refilling the Tank and Long-Term Protection
Refilling your tank is the final step in learning how to flush a water heater to remove sediment. Don't rush this part. You must follow the "Air-Bleed" process to protect your appliance. Keep a hot water tap open somewhere in your house while the tank refills. This allows air pockets to escape the system. If you skip this, air will stay trapped at the top of the tank. For electric models, these air pockets can melt your heating elements in seconds. You want a working heater and a safe home, right? You've worked hard to clean the tank; don't destroy it now.
Wait for a steady, strong stream of water to flow from your open faucet. This confirms the tank is 100% full. Once you have a consistent flow, you can safely restore the power or gas. While you wait, check your anode rod. This is a sacrificial component designed to corrode so your tank doesn't. If the rod is thin or covered in calcium, replace it immediately. You might also consider a whole-home water softener. These systems stop sediment before it ever enters your tank, making future maintenance a breeze. This is the best way to solve hard water issues for good.
Restoring Power and Gas Safely
For electric heaters, flip the dedicated breaker back to the ON position. Never do this until you are certain the tank is full. For gas units, turn the control knob from Pilot back to the On position. Adjust your thermostat to 120°F. This is the optimal temperature for safety and efficiency. Listen closely as the heater engages. You should hear a smooth operation without the rattling you faced before. Check the area around the drain valve for any immediate leaks. We want a clean-up like it's our own, so leave the space spotless and dry.
When to Call a Professional FAST
Sometimes a routine maintenance task reveals a bigger problem. If your drain valve won't close or continues to drip, you have an emergency. A leaking valve can quickly flood your home. Also, watch for puddles at the base of the tank. A puddle usually indicates an internal tank rupture rather than a simple sediment issue. In these cases, a flush won't solve the problem; you likely need a full replacement. Don't wait for a catastrophe to happen. If you're unsure about any step or see signs of failure, get expert help. Fast Plumbing is at your door - fast and hassle-free. We'll handle the gunk and get your hot water back ASAP.
Restore Your Hot Water Performance Today
You now have the professional roadmap for how to flush a water heater to remove sediment. By clearing out those heavy mineral deposits, you have silenced the annoying popping noises and protected your tank from a catastrophic failure. Consistent annual maintenance is the primary key to keeping your energy bills low and your showers hot. It is a simple task that saves you from expensive, emergency repairs down the road. You've taken the right steps to extend the life of your appliance and ensure your home stays comfortable.
If the flushing process feels overwhelming or your drain valve refuses to cooperate, don't risk a garage flood or a broken unit. Our licensed and insured master plumbers are standing by with 24/7 emergency service to handle the tough jobs for you. We pride ourselves on our 1-minute callback guarantee and our commitment to leaving your home spotless. Get your water heater serviced FAST by our expert team and enjoy total peace of mind today. You deserve a quiet, efficient, and hassle-free home, right? Let's get your water heater running like new.
Frequently Asked Questions
Is it normal for a water heater to make popping noises?
Popping noises are a major red flag that indicate you need to learn how to flush a water heater to remove sediment before your tank fails. This sound, known as kettling, occurs when steam bubbles struggle to escape through the sediment layer. It is not normal and means your heater is struggling to function. Ignoring these sounds leads to localized overheating and eventually a cracked tank. You should address this noise ASAP.
Can I flush my water heater without turning off the water?
You should never perform a full flush without turning off the heat source and the cold water supply. Draining a tank while the gas or electricity is on will destroy your heating elements or the tank itself in seconds. While some people perform a quick five-second purge with the water on, a professional-grade clean requires a full shutdown to remove all the heavy debris safely and effectively.
What happens if I never flush my water heater?
If you never maintain your tank, your energy bills will climb as heating efficiency drops. Sediment creates an insulating barrier that forces your heater to work twice as hard to reach temperature. Over time, this constant overheating causes the tank to corrode and eventually rupture. Since 40% to 50% of heater failures cause significant property damage, skipping this simple task is a gamble you don't want to take.
How much sediment is too much in a water heater?
Any amount of buildup that causes noise or reduces your hot water volume is too much. In hard-water regions, even a small layer of minerals can decrease efficiency by 10% or more. If you see visible pebbles or cloudy water during a test, the buildup is already affecting your appliance's health. You need to clear the tank to prevent the lower heating element from burning out completely and avoid a costly replacement.
Why is the water coming out of my heater cloudy after a flush?
Cloudy water is usually the result of harmless air bubbles trapped in the system during the refill process. These bubbles should disappear within a few minutes of running your hot water taps. If the water remains gritty or discolored, you likely have fine sediment still circulating in the tank. A second pressurized flush will usually solve the problem and get your water back to crystal clear status fast and hassle-free.
Can a homeowner replace a water heater drain valve?
Homeowners can replace a drain valve, but it is a delicate job that can lead to a major flood if done incorrectly. Most factory-installed valves are made of plastic and can snap easily during removal. We recommend upgrading to a brass ball valve for a more durable, long-term solution. If you are uncomfortable working with pressurized water or old threads, let our master plumbers handle the swap for you safely.
How long does it take to flush a water heater for sediment?
A thorough flush typically takes between one and three hours. This includes the time required to let the water cool to a safe temperature. The actual process of how to flush a water heater to remove sediment takes about 30 minutes once the tank is ready. Investing this small amount of time once a year keeps your system running at peak performance and prevents those middle-of-the-night plumbing emergencies, right?
Will flushing my water heater improve water pressure?
Flushing primarily restores heating efficiency and hot water volume rather than improving overall house water pressure. However, sediment can travel into your pipes and clog faucet aerators or showerheads, which restricts flow. By clearing the tank, you prevent these mineral chunks from causing blockages throughout your home. If pressure remains low after a flush, you might have a failing pressure reducing valve or a leak elsewhere in your system.
